Showing posts with label tips computing. Show all posts
How to Set the APN (Access Point Name) on the BlackBerry
about how to set the APN (Access Point Name) on the BlackBerry that may be very useful for beginners BlackBerry users. So that while doing an internet connection with your BlackBerry or run a 3rd Party App that requires your internet data services will not be affected by cost cuts GPRS anymore, because you have subscribed to the service pack BIS (BlackBerry Internet Service).
Here's how to set the APN (Access Point Name) on the BlackBerry is CORRECT, which uses the connection point of the BIS service.
- Go to the Options> Advance Options> TCP / IP
- In the "APN Settings Enabled" on the check
- In the "APN:" content with blackberry.net
- "APN Authentication Enabled" just empty "Username for APN" and "Password for APN"
Monday, July 09, 2012
How To Restart or Reboot Your BlackBerry
Restart or reboot your BlackBerry is in the usual way you should do if you have a BlackBerry Error, Hang, or when you have finished upgrading your BlackBerry applications.
Well, if you upgrade your BlackBerry applications, requests Reboot your BlackBerry will run automatically, and what if your BlackBerry is in error or hang? Of course you have to restart or reboot your BlackBerry, here's how.
Note:
- Restart or reboot your BlackBerry should be done every BlackBerry application upgrade is complete.A soft restart or reboot your BlackBerry:
- Sometimes your BlackBerry error could be solved with a restart or reboot your BlackBerry.
The Same Time press the ALT key (left) + aA (Right + DEL (right), then the BlackBerry you will immediately restart or reboot too.
Or if you can not, press the End Call until your BlackBerry off, then unplug the battery for 5 minutes and plug it back,
Wednesday, June 27, 2012
How to Create a BlackBerry Email Account
To maximize the BlackBerry Push Mail services. we must have an email account first. BlackBerry email account to be used also vary both Yahoo Mail, Google Mail, or Windows Live (Hotmail, MSN, Live) and others. This time I will explain how to create a BlackBerry email account with Google Mail as a blend for you.
1. Create Email Account :
2. Open the browser via the computer and go to gmail.com, click Create an account like in the picture above
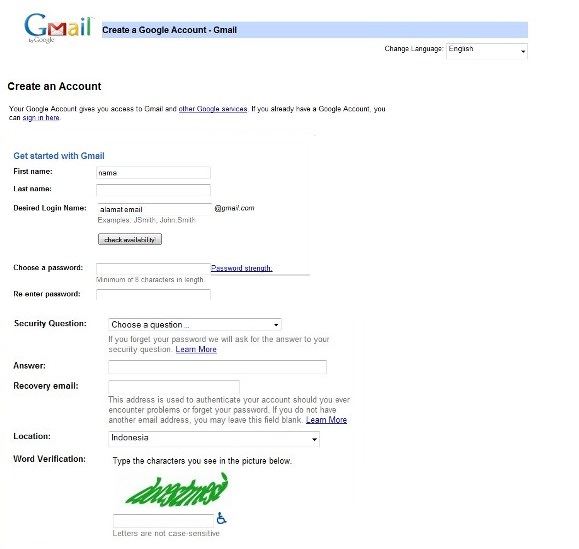
3. Fill in the form provided and make your email address.
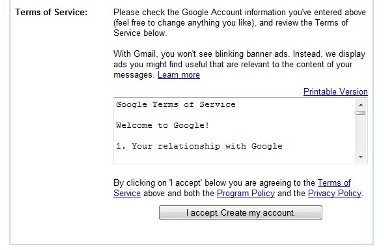
4. If it is click I accept. Create my account.
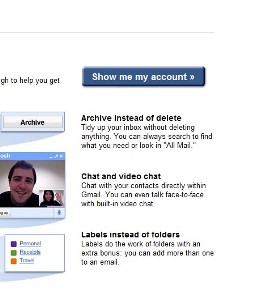
Setting BlackBerry Email Account
Now we are setting and activate the email account that we created earlier on the BlackBerry.
Go to the Email Settings menu and click Add, select Gmail. Fill in the form e-mail address and password that you created earlier and click Next
And you will receive your first email that your BlackBerry email account activation success like the picture above.
Wednesday, June 27, 2012
How To Install Winamp Application On Windows
WinAmp is the software, to listen to music, which is very accurate. This software supports WAV, Audiosoft, MOD, and other audio formats. It will also include a list of software editor and 10-band graphic equalizer. ICW introduce here an interesting feature is the availability to change the look of the program through the Skins. You can get from the internet or your own edit. With Plug-Ins you can also add effects like echo (echo) on the music in realtime. In this version of winamp even capable of displaying WMA files (Microsoft Window Media)!! and many features are provided by winamp
To install winamp, you can follow the following Steps :
1 .If you don't have an application winamp you may download from the following here
2. Run exsekusinya file (EXE) see in the image that has been listed on below.
2. On the License Agreement page, click I Agree to agree the license granted. Look at the picture below.
3. The next type of installation is displayed, select the full or select the components to be included in the installation. Click next to continue the installation, see in the image below.
4. In the next step you are asked to specify the storage location of the installation of winamp program. Determine the location and press next. Look at the picture below.
5. On the Choose Install Options on the Select icon to install and media associations select the components that are included in the installation and click Next to continue.
6. On the Internet Connection Settings page, specify the type of internet connection you are using on the Internet Connection. If your computer is not connected to the network choose not intenet connection to the internet click next to continue.
7. On the display menu and dialog boxes in the following language, you are asked to specify a language, click the Next button to continue the installation.
8. Furthermore the installation process will run, wait until the installation is complete.
9. After the installation process is complete, the program is installed winamp will run and the program can begin to be used.
Wednesday, June 27, 2012
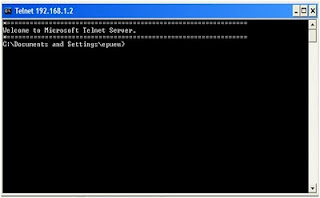
Remote Login withTelnet on Windows XP
Telnet (Telecommunication network) is a network protocol used on the Internet or Local Area Network to provide text-based communication facilities that use two-way interaction of virtual terminal connection.
This tutorial describes the steps for setting up telnet in windows xp. The following steps to setup telnet on windows xp :
1. Enter the control panel and then select adminitrative tools.
2. We continue to enter into service on the administrative.
Once inside the administrative tools, then select the service.
3. From service appears dialog as below and then search for "telnet"
4. Appears The Dialog as below, then on the Startup type select "Automatic" and click "Start"
5. After that go to the cmd ping an IP on a computer that will be targeted
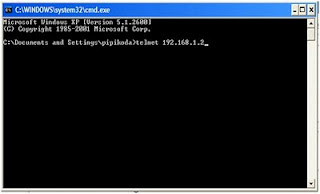
6. After entering telnet client in cmd type the command "n"
7. Then appear the login to get to the destination computer. Enter the user name and password destination computer.
8. You can log into the destination computer, please access your needs.
Tuesday, June 26, 2012
How To Auto-Posts to Facebook and Twitter With Twitterfeed
Twitterfeed is a service that helps simplify our work to tell our friends twitter and facebook when you create new posts in your blog. Of course you have to do this so you do not make a post again regarding your new blog posts on twitter and facebook. You can do this as a way to market or promote the most effective thing you can do.
How it works is simple Twitterfeed, you only need to submit / register the address of your Blog RSS Feed and leave the service in charge of sending the "automatic" to your twitter account.
Here's How to Register Your Blog RSS FEED Twitterfeed:
![]()
- Of course you must already have an account on twitter.
- Click here to sign up, then click "Register Now".
- On the page "Twitterfeed Sign Up", fill in your email address and password you will use to log into acount Twitterfeed. Check the box labeled "Please include me on Important updates and information That effect my Twitterfeed account" if you want to get the latest news from twitterfeed via email, but if you do not want to leave it alone. Then click "Create Account".
- If you have successfully registered, login using your email address and password that you registered earlier.
- Twitterfeed page, please enter the address setting the Rss Feed your blog on the "my twitter feeds" and option "Create new twitter feed". (You can register more than one address of your blog RSS FEED).
- After work, please check whether twitterfeed able to work well, after you post a new article on your blog.
- Thus simple steps how to register your blog RSS FEED in Twitterfeed. Hopefully by using these services work online promotion or marketing your products through blogs much easier.
Tuesday, June 26, 2012
[Review] Game Grand Theft Auto III
At this game, you will act as an escaped prisoner in the town of Liberty City. There was no clear information about who the characters you play (until eventually you will know that his name was Claude).
Beginning of the game is challenging enough that you are driving a stolen car carrying fellow prisoner (prisoner) to a safe place. You will be involved in the intrigue among the criminals in Liberty City, and you will feel addicted while playing a mission after mission such as for example on the road racing, da scuffle shootout, and free to roam anywhere.
When playing in iPhone, control is quite a problem. all buttons and functions are shown with the icon. If you did not know could be dangerous to the survival of the character that you play. Icon such as brakes and gas are probably some people will look similar. Fun for the driving mode, this game makes it possible to use the facilities on the iPhone accelerometer, that control the phone like a real steering wheel controls as you do every day. Cool!
As for the shoot and hit the controls feel a little stiff to the touch. when to play it, we have to actually memorize the layout of buttons and a camera view that is now difficult to control without using the analog sticks.
As the game IOS, this game's graphics look good even though it may look much broken, especially on the iPad. but that would definitely smoother than the console version.
This game can be obtained by downloading it for U.S. $ 4.99. and can be played on iPhone, iPod touch and iPad with minimal operating system IOS 4.3 or later.
Beginning of the game is challenging enough that you are driving a stolen car carrying fellow prisoner (prisoner) to a safe place. You will be involved in the intrigue among the criminals in Liberty City, and you will feel addicted while playing a mission after mission such as for example on the road racing, da scuffle shootout, and free to roam anywhere.
When playing in iPhone, control is quite a problem. all buttons and functions are shown with the icon. If you did not know could be dangerous to the survival of the character that you play. Icon such as brakes and gas are probably some people will look similar. Fun for the driving mode, this game makes it possible to use the facilities on the iPhone accelerometer, that control the phone like a real steering wheel controls as you do every day. Cool!
As the game IOS, this game's graphics look good even though it may look much broken, especially on the iPad. but that would definitely smoother than the console version.
This game can be obtained by downloading it for U.S. $ 4.99. and can be played on iPhone, iPod touch and iPad with minimal operating system IOS 4.3 or later.
Monday, June 25, 2012
[Review] Overclock Android Can Use SetCPU
With overclocking, we could feel the higher performance of the hardware used. Now, overclocking not only be done on a desktop PC, but also on mobile phones. As is known, the phone is also a computer, but with a smaller size. So it should be, the phone can also be overclocked.
With an application called SetCPU, Google Android-based phones can be overclocked. According to the developer, SetCPU for Android is an application specifically designed to change the CPU speed of the Android root access (root access).
To be able to install this application, the user must have an Android device with the issue of the OS version 1.5 and above, including the Cupcake (1.5), Donut (2.0), and Eclair (2.1). In addition, the user must have root acess and modify the kernel cpufreq.
Monday, June 25, 2012
How To Play a Song With Personal Video Files On The Game GTA San Andreas (PC)
Follow The steps :
- Prepare your audio files to the format. Mp3 without compression. If you already determine select the option COPY all your audio files.
- Next, put the directory MyDocument> GTA San Andreas User Files> User Tracks. Paste all your audio files there.
- Next, open the game GTA: SA you, select Options> Audio Setup> User Track Options and click the Scan User Tracks, let the games scan your audio file complete.
- Prepare your audio files to the format. Mp3 without compression. If you already determine select the option COPY all your audio files.
- Next, put the directory MyDocument> GTA San Andreas User Files> User Tracks. Paste all your audio files there.
- Next, open the game GTA: SA you, select Options> Audio Setup> User Track Options and click the Scan User Tracks, let the games audio file you scan to complete.
- If you have, go into the game, try riding a car and select a radio channel TRACK PLAYER USER by pressing the INSERT if you use the keyboard.
- You sually the audio file is played straight, sometimes up ads. You can menskip / change tracks by pressing the F5 key.
Monday, June 25, 2012
Tips -Tricks PES 2012
Tips - tricks dribble PES 2012:
diagonal bounce: hold L2, point to the left and right analog left to upper right analog
heel chop: hold L2, point the right analog and analog left up to the top
Backhell Feint: hold L2, turn 1/4 analog loop from left to right upward and downward left analog
Rainbow Flick: hold L2 and press the right analog 2 times
Ball roll 1: hold L2, aim down the right analog
Ball roll 2: hold L2, point the right analog down then up
Front Flick: hold L2, press the right analog left and analog right to left direction of the (oblique)
in this position we can just press the button box (immediately released,) then wait a while until the player moves the ball closer.
after the player is in a position near the ball, we press the directional keys up / down by pressing it until the player kicking the ball.
Monday, June 25, 2012
How To Register to ALEXA Site

The following registration steps blog / website on Alexa in detail:
1. Sign in to Alexa.com.
2. Then select the tab 'Site Tools'.
3. Click on 'Claim Your Site'.
2. Then select the tab 'Site Tools'.
3. Click on 'Claim Your Site'.
4. Enter a url blog / your website, then click on 'Claim your site'.
5. List prior to login, or for practical can directly login with your Facebook account located on the right login form.
6. Then enter the verification page. There are two ways to upload HTML to the blog's root directory (this is if you have your own hosting), or enter a key meta Alexa found on the second option. Use the second option in order to more quickly and easily. Here's how: copy its meta key and paste it in your HTML template. Put in between <head> and </ head>, so quickly put forth at the top (near <head>) after the meta keyword and meta description of your blog. Then save the template.
7. click on 'Verify my meta tag'. If successful there will be information indicating that you have managed to claim your blog.
8. Get Alexa widget to be installed. Go to the 'Site Tools' again and select 'Alexa Site Widgets'.
9. There are several types of widgets there, you just choose where you'd like to put on the blog, enter your blog url, and copy the code.
10. Go to the page design >> page elements, click the add gadget, and choose add HTML / Javascript, paste the code into the column, and save. Put on the desired page, then save again.
You're done!
10. Go to the page design >> page elements, click the add gadget, and choose add HTML / Javascript, paste the code into the column, and save. Put on the desired page, then save again.
You're done!
Sunday, June 24, 2012
How to Install XAMPP on Windows Server Local PC / Laptop
Immediately following the steps for installing a local server XAMPP on Windows on a PC / Laptop:
step 1
Go to site Xampp (http://www.apachefriends.org) or download here if you do not have.
step 2
Click xampp.exe, then the display appears as shown below, then click Install.
Step 3
Wait until the extracting process is complete.
step 4
After extracting finished, type "y" are each steps then appear like this.
Press Enter.
step 5
Then select the no.1 to run xampp control panel.
Step 6
Run Apache and Mysql Service as shown below.
step 7
Choose Exit by typing x as drawn. Local Server then you are already active.
step 8
Open a web browser on your PC / laptop (Firefox / Chrome).
Type in http://localhost, it will appear as shown below, then select the language you want.
step 9
If the display appears as below the local server (XAMPP) has been successfully installed on your PC / laptop.
step 1
Go to site Xampp (http://www.apachefriends.org) or download here if you do not have.
step 2
Click xampp.exe, then the display appears as shown below, then click Install.
Wait until the extracting process is complete.
step 4
After extracting finished, type "y" are each steps then appear like this.
Press Enter.
step 5
Then select the no.1 to run xampp control panel.
Step 6
Run Apache and Mysql Service as shown below.
Choose Exit by typing x as drawn. Local Server then you are already active.
Open a web browser on your PC / laptop (Firefox / Chrome).
Type in http://localhost, it will appear as shown below, then select the language you want.
step 9
If the display appears as below the local server (XAMPP) has been successfully installed on your PC / laptop.
Sunday, June 24, 2012
Subscribe to:
Posts (RSS)